Weather-based automations in Home Assistant
Today I want to share an idea I've been turning over for a while: building Home Assistant automations that don't just look at the temperature inside the house, but also check what's happening outside before deciding whether to heat, ventilate, or warn us that it's about to rain in 15 minutes, like they do in Formula 1.
The building blocks are already there. Home Assistant gets readings from Netatmo weather stations near me, including temperature, humidity and rainfall, as well as forecasts from external services such as Met.no. Inside the house, I have loads of temperature and humidity sensors, radiators, air conditioning, and contact sensors on some windows, the balcony door and, for example, the door to the utility room.
With all that in place, here are a few automations I've been thinking about. They can be built with either the Home app or Home Assistant. The other day, a listener complained that I was focusing more on Home Assistant and less on HomeKit. Well, that's not exactly true, but Home Assistant does offer a few things that the Home app… I was going to say we'd have to wait a while to see, but no: some things simply aren't going to happen there. Still, let me walk you through these automations. You can build them with Shortcuts in the Home app, with Controller for HomeKit, or with Home Assistant, so everyone's happy. Let's get to it.
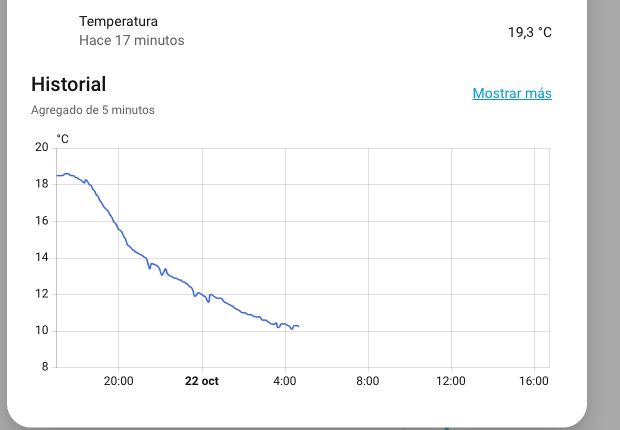
The outdoor temperature and history Home Assistant can already read. The screenshot is cropped to hide the home's location.
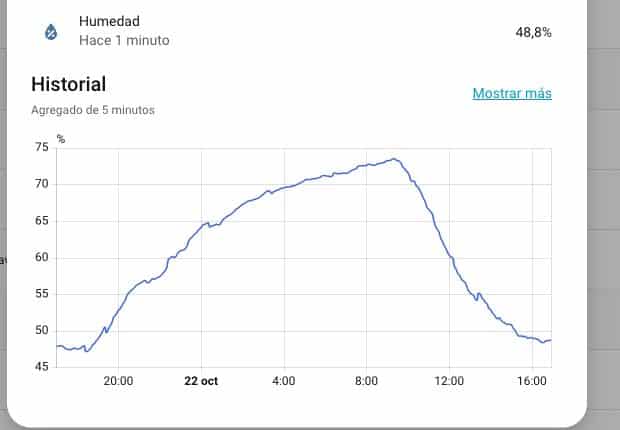
Outdoor humidity comes in as a separate reading. The screenshot only shows the sensor panel, without the home or weather-station name.
A clear boundary between Home Assistant and Apple Home
In any case, Home Assistant is the best place to compare sensors and keep a threshold in place for a while. The Home app is great for triggering scenes and showing alerts on an iPhone, but some automations aren't as easy to build there. We can now create a Shortcut by saying what we want it to do, but even then, it isn't simple. So my proposal is to let Home Assistant do the calculations—add, subtract, multiply, that sort of thing, which would be a nightmare to do in a Shortcut—and expose four results as contact sensors through the HomeKit bridge:
- Weather – Frost
- Weather – Raining
- Weather – Ventilation recommended
- Weather – Warm outside
If a contact sensor is open, that means its condition is true. The Home app doesn't have to understand rainfall, compare two temperatures or count how long a reading has stayed stable. If an outdoor reading isn't available, the corresponding status contact stays closed, so the warm-weather scene doesn't run. Any rule triggered by a contact closing should also check that the readings are still valid.
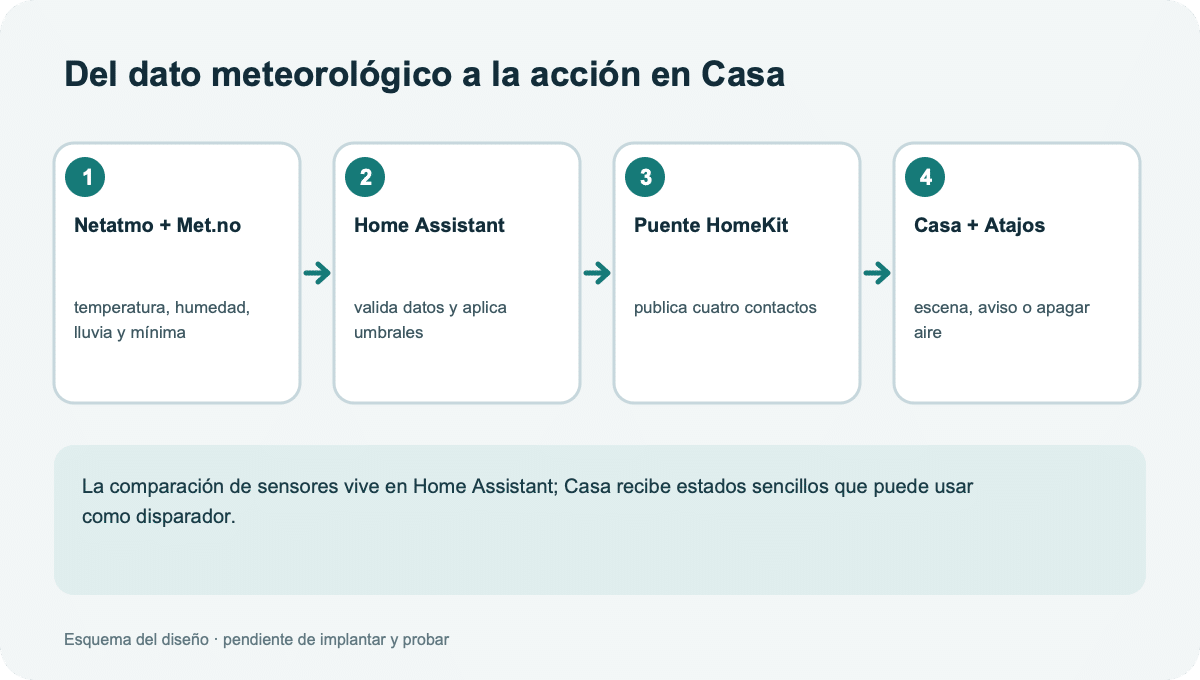
Diagram of the data flow. This illustrates the proposed design; it is not a screenshot of an already deployed configuration.
As I said, I set myself one requirement for these automations: they also need to be possible with Shortcuts. I don't want an important feature to depend on a workflow that's exclusive to Controller or Home Assistant. In the Home app, an automation can be converted into a Shortcut to run conditions and actions, while Home Assistant provides the calculated sensors. Let's see what we can get out of this trombone.
First up: put the heating into eco mode when it's warm outside
This is one of the obvious ones. If the outdoor temperature stays above 18 °C for an hour, the Weather – Warm outside sensor activates. In Apple Home, a Shortcut runs the “Radiators in eco mode” scene. When the outdoor temperature drops below 16 °C, the sensor closes and Home runs “Radiators schedule” so the existing schedule can take over again.
The gap between 18 and 16 degrees is there to stop the scene flipping back and forth if the temperature hovers around one value. Before activating this, we need to decide exactly what “eco” means for each radiator and check that it doesn't clash with existing schedules. Those automations stay as they are; this rule simply disables them when it knows it's warm outside and the house will soon warm up anyway.
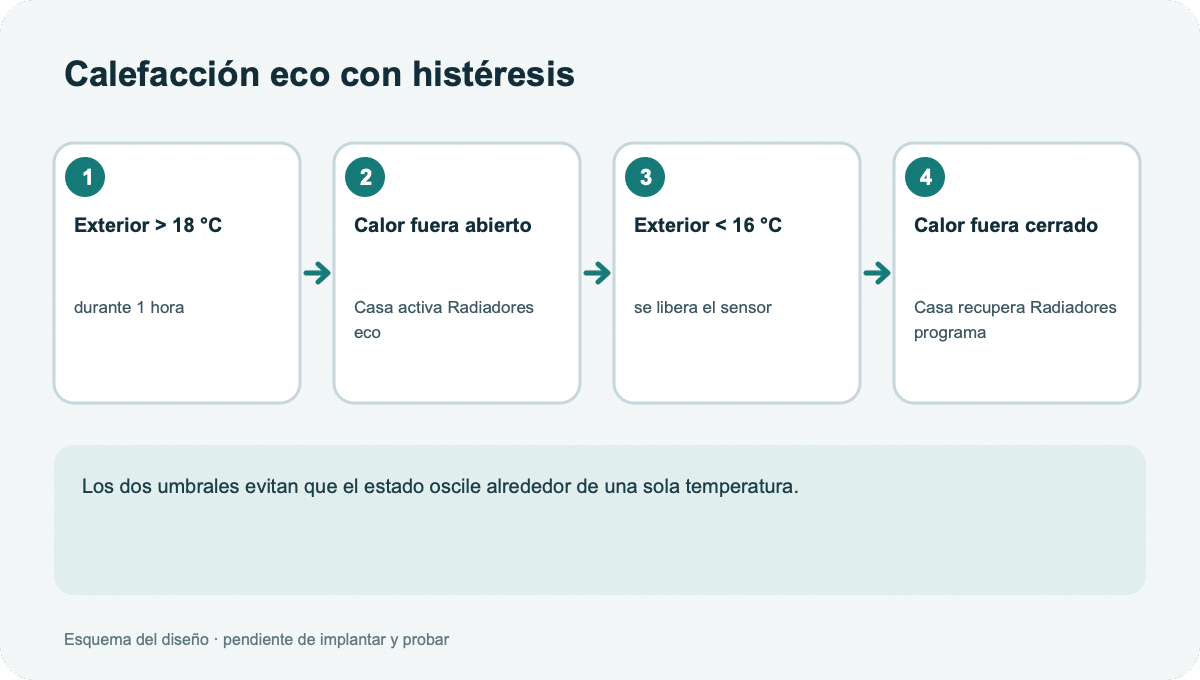
Proposed design: the warm-outside sensor stays active between the two thresholds to prevent oscillation.
Open window and heating: stop heating the street
The second automation is simple and useful in winter. If the living-room window has been open for more than five minutes and it's below 15 °C outside, the radiator switches to frost protection or the boiler turns off. If the window is still open after twenty minutes, the iPhone gets an alert. Once the window, door or whatever was open is closed, the radiator returns to its schedule.
That last step needs a bit of care: it's not enough to turn the radiator back on at a fixed temperature when the window closes. Home Assistant saves the previous mode and restores it, so the living room doesn't end up in a different state from before. If the outdoor sensor says “unavailable”, the radiator is left alone.
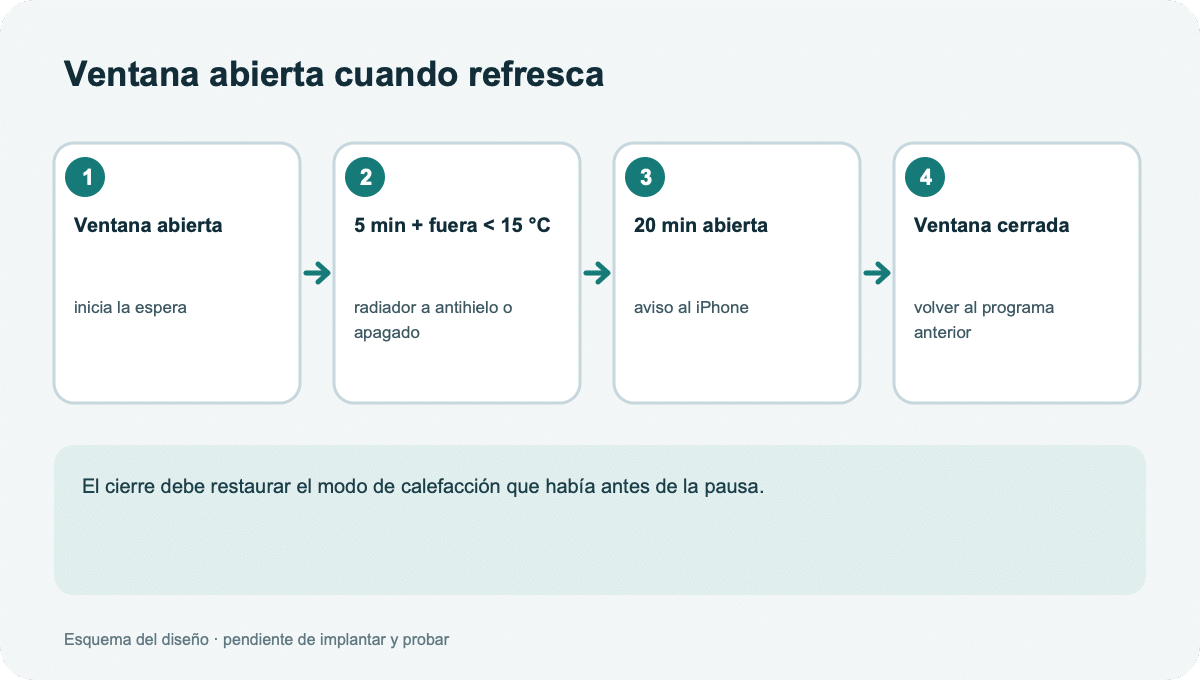
Proposed flow: delay the action, alert if the window stays open, and restore the previous mode.
If it starts raining, tell me if anything is open
I like this one too: if it starts raining, send us an alert when something is open. The automation detects a change from dry to rainy when rainfall over the previous hour exceeds 0.2 millimetres. It sends the alert once, not a new notification with every sensor reading. It also checks the window contacts and the utility-room or balcony door to tell us which one is open.
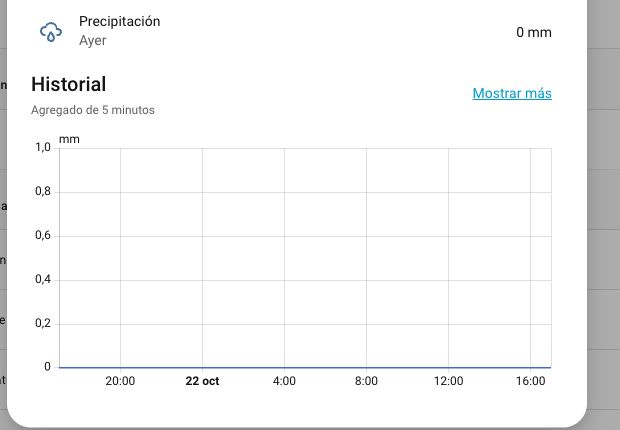
Real screenshot of the rainfall sensor in Home Assistant. The alert would trigger when the configured threshold is exceeded and a new rainfall event is detected.
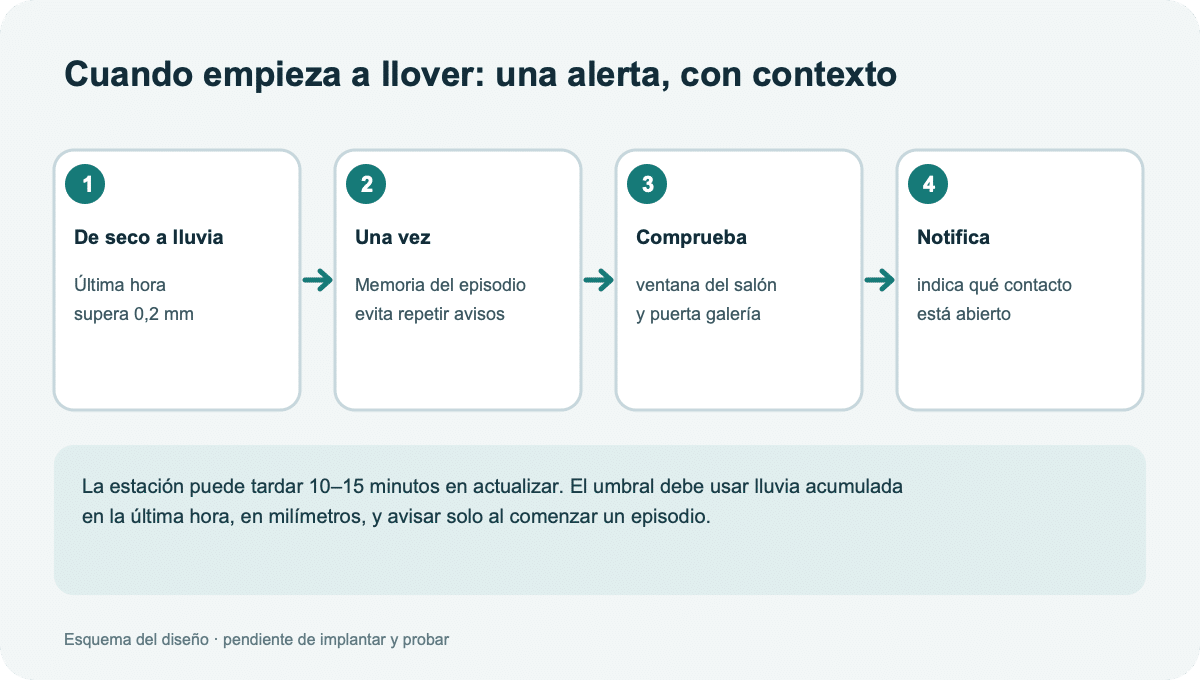
Proposed alert when a rainfall event begins.
There's a practical limitation here: Netatmo updates roughly every ten minutes, and rainfall data may arrive ten or fifteen minutes late. The notification helps us react, but it can't promise to alert us in the first minute of rain. This isn't Formula 1, as I said earlier. It would be really cool to know which service they've got, honestly.
Frost: combine the measurement with the forecast
The frost alert would have two parts. At nine in the evening, if Met.no forecasts a low below 2 °C, I'd get an advance warning: check the plants, the car parked outside the garage (we know where it is from the AirTag I keep in the car), and anything else that needs attention. Overnight, between ten and eight, if the outdoor sensor drops below 2 °C and stays there for fifteen minutes, I get an alert confirming actual frost. At most once per night.
The forecast gives us a chance to prepare. And if the outdoor reading isn't available, the automation doesn't invent a frost warning.
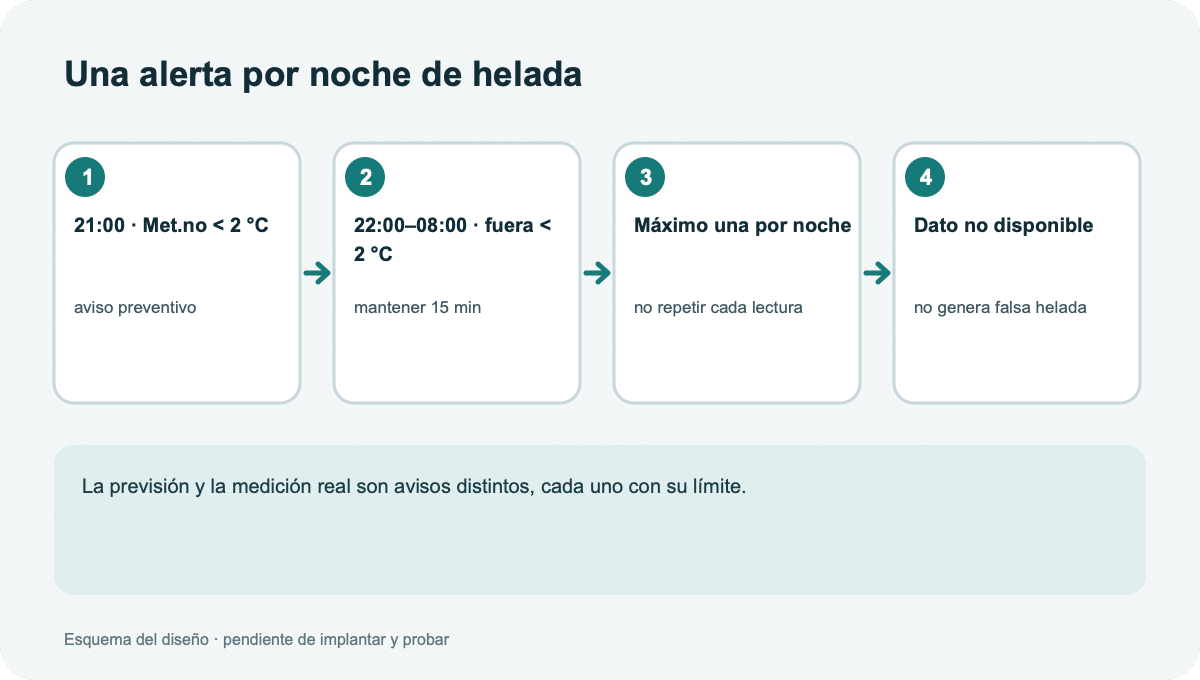
Two separate alerts: an advance warning based on Met.no and a confirmed alert based on the outdoor temperature.
Ventilate when the outdoor air can actually help
I've only worked this part out on paper, and I won't activate it until spring. The initial conditions are: outside is at least two degrees cooler than the living room, the outdoor temperature is below 24 °C, and outdoor humidity is below 80%. If those conditions are met, the “Weather – Ventilation recommended” sensor can trigger an alert, at most once per afternoon.
Also, if the air conditioning is on and a window opens, a Shortcut in Apple Home turns it off. That action stays in the Home app: the window sensor is already a HomeKit trigger, and the automation can be converted into a Shortcut. It won't turn the air conditioning back on when the window closes, because someone may have switched it off deliberately.
There's one nuance about humidity: comparing only indoor and outdoor relative humidity can lead us astray. That 80% figure is just an initial filter. Later on, it would make sense to calculate absolute humidity or dew point before recommending ventilation, especially on cold, damp days.
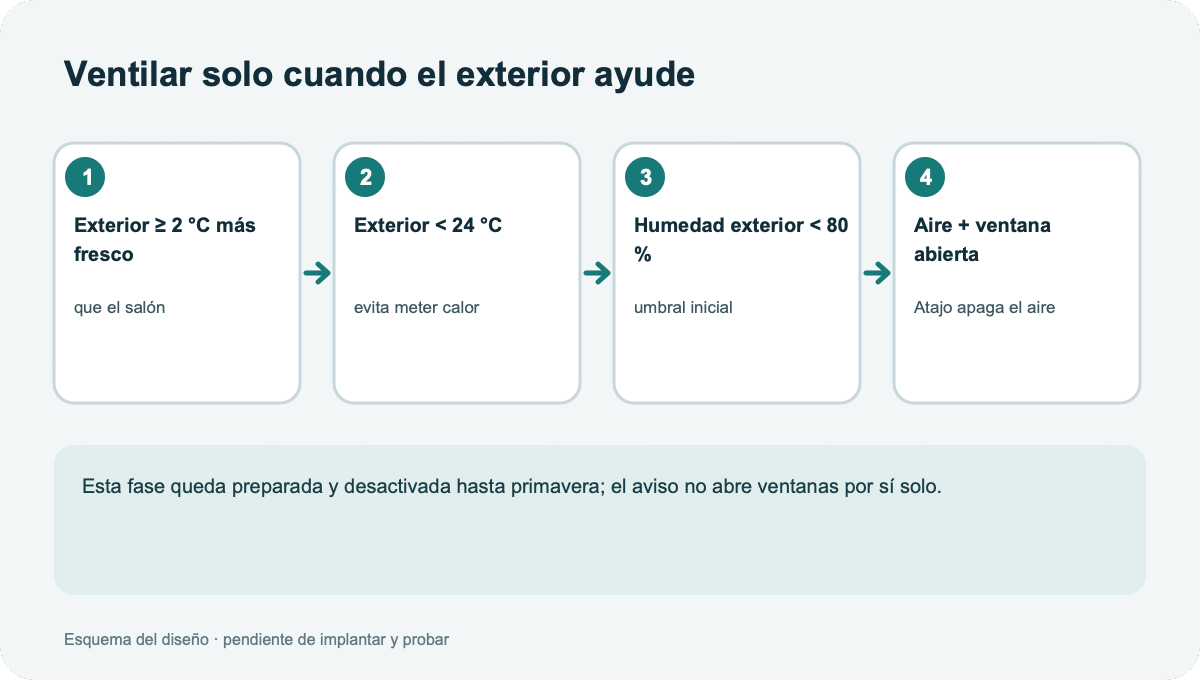
Design for the ventilation phase, which will stay disabled until spring. The Shortcut would turn off the air conditioning when a window opens.
Two more ideas: check the data and indoor humidity
I can think of two more automations that make use of the sensors already in the house. The first is an alert if the Netatmo stations stop providing valid data for more than twenty minutes.
The second is an alert when indoor humidity stays high for a long time, using the Aqara sensors in each room. For example, we could look at a threshold around 65% for half an hour, but I'd tune it against real readings from each room before deciding. If the outdoor conditions are good too, the alert could suggest opening a window.
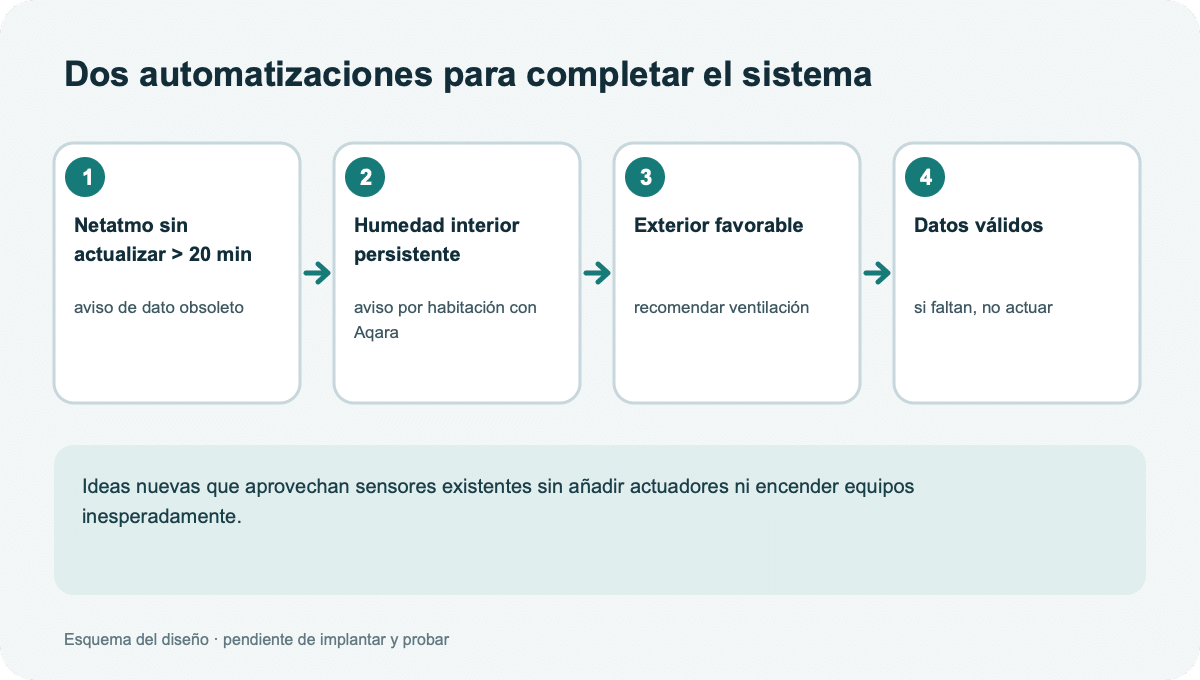
Two possible additions that don't depend on the radiators. The humidity thresholds still need to be decided after observing each room.
Two automations, step by step
To make this easier to follow when listening too, I'll walk through two ideas step by step. The first uses Home Assistant to decide when it makes sense to put the radiators into eco mode. The second uses a simple HomeKit automation to turn off the air conditioning if a window opens.
1. It's warm outside: put the radiators in eco mode
In Home Assistant: create a Toggle helper called something like “Weather – Warm outside active”. Add one automation that turns it on when sensor.temperatura_exterior stays above 18 °C for an hour, and another that turns it off when the temperature drops below 16 °C. The helper preserves the hysteresis: between 16 and 18 degrees, its state doesn't change. To expose its state to HomeKit as a contact sensor, create a template binary_sensor with device_class: opening; the Toggle helper on its own is exposed as a switch. Also create a binary sensor called “Weather – Outdoor data valid”, which opens only when the reading is numeric and recent, and expose both binary sensors through the HomeKit bridge. In Apple Home, convert the rules into Shortcuts and check that “Outdoor data valid” is open before running either scene. That way, if the warm-outside contact closes because a reading went missing, the programmed scene won't run by accident. If Controller's editor lets you add that condition, use it there too. If not, keep the radiator actions in Home Assistant and require valid data there. The Home Assistant Template integration and HomeKit bridge can create and expose these sensors.
In the Home app: first create two scenes, “Radiators eco” and “Radiators schedule”, with the settings you want for each radiator. Then create an automation under When a sensor detects something, select the “Weather – Warm outside” contact and use its opening as the trigger for the eco scene. Create another automation for when it closes and select the schedule scene.
In Controller for HomeKit: go to Automations and add a standard HomeKit automation. Choose the contact sensor and its open state as the trigger, and select the “Radiators eco” scene as the action. Repeat for the closed state and “Radiators schedule”. You can also do this with a Controller Workflow, but that needs a Controller Hub to stay online, which we've talked about before.
The diagram summarises the 18/16-degree logic. Before activating the scenes, check whether an existing automation already changes the radiators; two rules shouldn't compete to control the same mode.
2. The living-room window opens: turn off the air conditioning
In the Home app: choose Add Automation and then When a sensor detects something. Select the living-room window sensor and choose “opens”; add an action to turn off the living-room air conditioning and save. If you want to check first whether the air conditioning is on, convert the automation into a Shortcut and add a condition. You know I always recommend that, so we're not sending commands all over the network for no reason. Don't add an action to turn it back on when the window closes: someone may have turned it off on purpose.
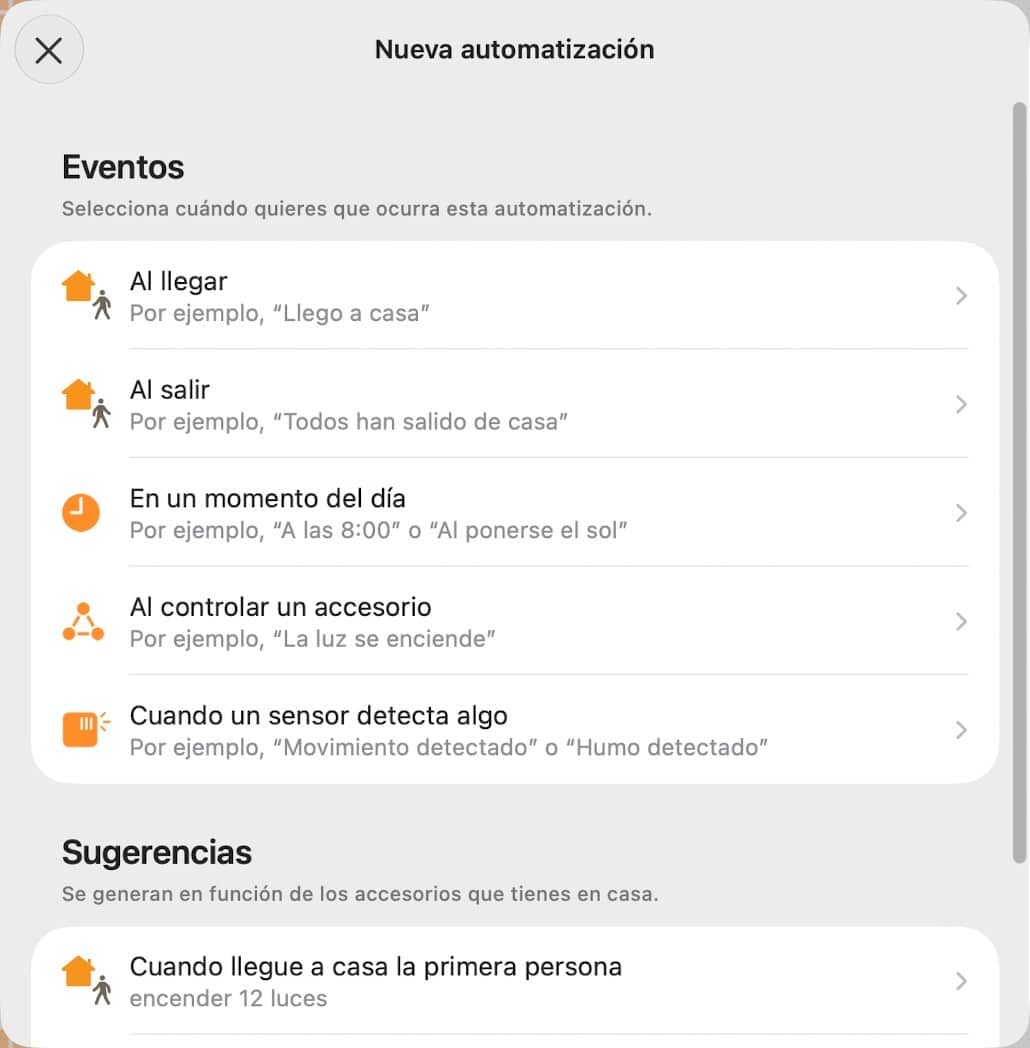
To detect the window opening, choose “When a sensor detects something” in the Home app. The block below shows suggestions generated by the app.
In Controller for HomeKit: create a standard automation, choose the door or contact sensor—depending on how the Home app presents that sensor—set it to open and add the action to turn off the air conditioning. The screenshot shows Controller's trigger selector; the exact name depends on the accessory type exposed by the bridge. Don't choose Workflows for this case if you want to keep it within the normal HomeKit flow.
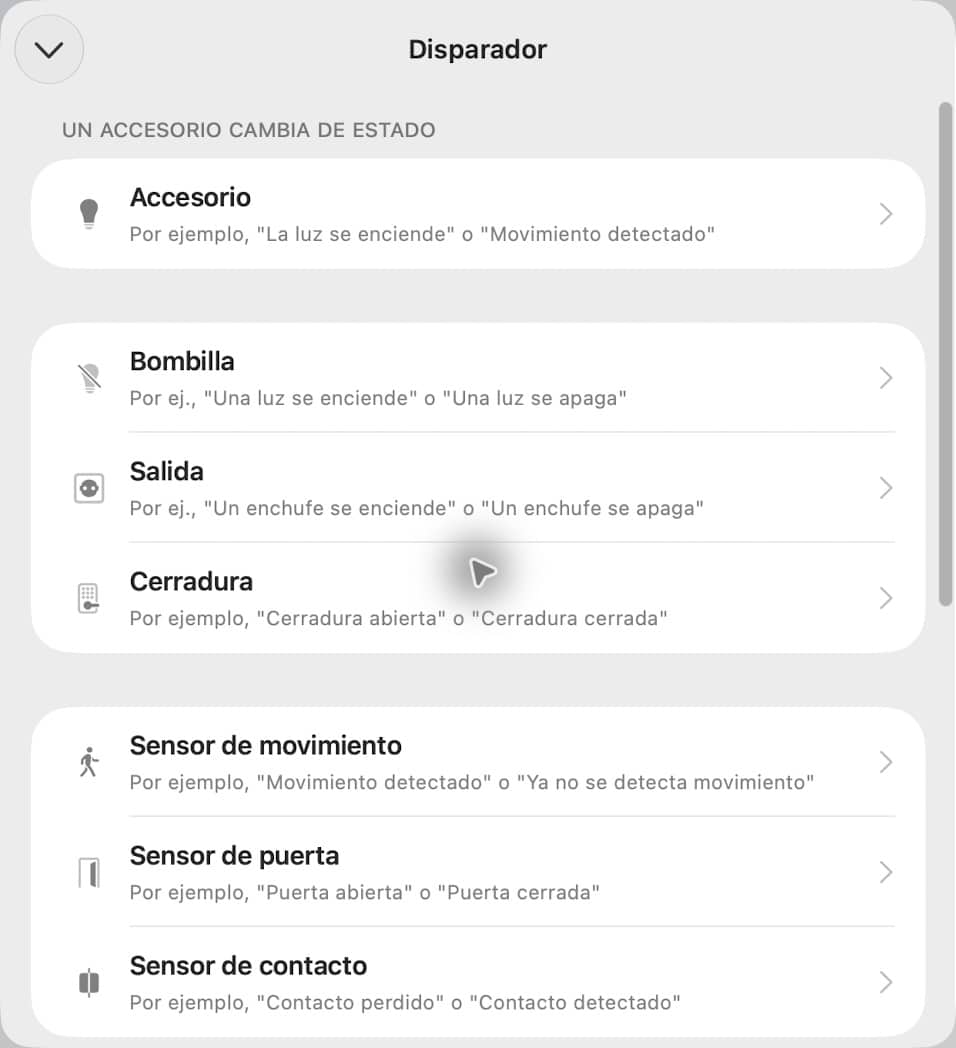
In Controller, a window trigger may appear as a door sensor or a contact sensor. Here you can see the selector before choosing the accessory.
In Home Assistant: create an automation triggered when binary_sensor.salon_ventana changes to open. Add a condition that climate.salon_2 isn't off, then run climate.turn_off. This keeps the logic in Home Assistant if you prefer not to split it between apps.
Design first; then test without leaving false states behind
That's what I mean when I say Home Assistant lets us do things that aren't as straightforward in the Home app with Shortcuts. I'm not saying they can't be done—don't get me wrong. There are some incredible Shortcuts out there; I have one from Antonio Bueno of the El Garaje de Cupertino podcast that's spectacular. But it is true that Home Assistant makes it easier to add calculations that tell us what's going on, while Apple Home and Shortcuts handle the actions. Also, design each automation to fail safely: if data is missing, it should do nothing. We need to prevent repeats too: one rain alert when a new rain event begins, one frost alert per night, and no scene loops when a sensor changes state several times.